

Last Update: 8 March 2019.
Backups are very important in terms of your WordPress website security against threats. Regular backups are one of the most crucial things for those who are bloggers or Webmasters.
In my earlier article, I explained to you how to secure your site with Sucuri plugin. But it mostly happens when we regularly update our website or blog, due to any minor mistake, our WordPress website crash or displays the white screen which is not only irritating but harmful for our huge work done on the site.
So, taking regular backups after each update is important. Now, there are two ways to create the backup of your WordPress website.
- Create a full backup of your WordPress website manually. (Time Consuming and Skills needed)
- Create a full backup of your WordPress website automatically. (Smart and Recommended method)
Step 1. Installing Updraft Plus Backup Plugin
This is the first step to a backup WordPress site. Firstly, you need to install the Updraftplus backup plugin by navigating to Plugins > Add new and in the plugin search box, type exactly “Updraftplus”.
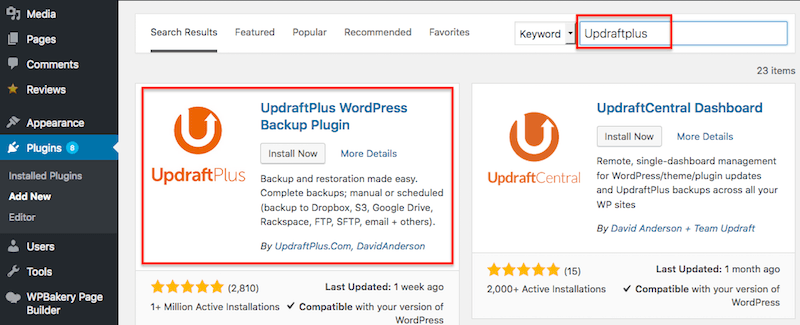
Most probably, the first result will be the right plugin but double check with the plugin developer name as “By UpdraftPlus.com, David Anderson”.
Install and activate the backup plugin.
Step 2. Setting up Updraft backup plugin for the First time
In this step, I will be guiding you on how to set up an Updraft backup plugin for the following tasks:
1. Configure the plugin for scheduling automatic backups.
2. Dropbox account signup for saving automatic backup files directly into it without human interference.
3. Downloading backup files on Computer or Laptop with a single click.
4. Deleting old backups for saving disk space.
UpdraftPlus plugin really has a great feature to Backup WordPress site within a few minutes with just a click and yes it’s true.
Along with that, this plugin also allows you to schedule automatic backups.
What does that mean?
It means you do not need to manually click on “create backup” button after writing every new post. After configuring this plugin for automatic backups, you can leave the backup section and just focus on your other tasks.
This plugin automatically creates the backup for you as per your scheduled time and saves it for you in your Dropbox or other cloud accounts free of cost.
Configure the plugin for scheduling automatic backups.
After logging in to your WordPress dashboard, go to Settings > Updraftplus Backups > Settings Tab

As you can see in the above image, under the “settings” tab, there are numbers of options to play with this plugin.
A. File backups schedule: From this dropdown option, you can select the appropriate time when you want this plugin to create the backup for you, automatically and saves to your Dropbox account.
B. Database backups schedule: Similarly, from this dropdown too, select an appropriate time for creating automatic backup of your WordPress website database.
C. Choose your remote storage: Here, select the “Dropbox” option. I will be guiding you in the next step of how to create a free Dropbox account step by step and send automatically created backups directly into it.
D. Include in files backup: In this step, tick all checkboxes. This option means, what are the files that you want to create as a backup.
E. Hit “Save changes” and then after a pop up will appear, asking you to click a link in order to authorize your Dropbox account to receive the backups. Click on that link and you will be redirected to Dropbox login/signup page.
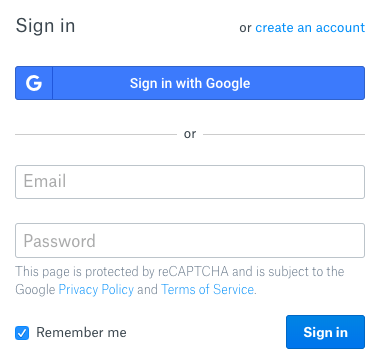
How to Sign up on Dropbox
Dropbox is great cloud storage for your files including videos, images, texts, website backups etc. By default, it provides you free storage of 5GB on each new signup.
In order to create an account on Dropbox, either Sign up with Google or manually fill up the signup form.
Visit: www.dropbox.com
Step 3: Backup WordPress site for the first time and download files on Computer
In this step, I will be guiding you on how to create your first backup of the WordPress site and download all the backup files on your Computer.
Let’s go ahead.
Go to Settings > Updraftplus backups > Hit “Backup now” button.
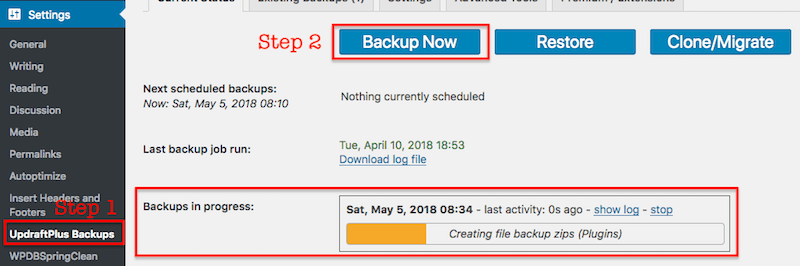
In the above picture, you can see the “Backups in progress” bar after hitting the “Backup now” button.
This whole process takes a couple of minutes in order to create a complete backup of your WordPress website. Once, the entire backup is created, go to “Existing backups” tab and download the files one by one.

So, this is how easy to backup WordPress site with one click and download the entire backup on your computer hard disk. I hope this article was helpful to you. Good Luck!
Next:
Learn about How to speed up WordPress website

