Start a Blog for a full-time passive income
Blogging is not just writing something all the time, but, with a blog, you can share your thoughts in your own unique way with the people to whom you even don’t know, you can help them with their problems, establish yourself in a professional way and Earn full-time Passive Income.
Enroll Today in my 100% Free Blogging Course on Udemy
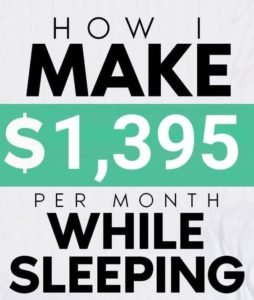
Below is my Earnings proof in the first year of my Blogging Career

Earning with a blog is not tough though you need to be a regular writer, passionate of writing articles or what you love and keep doing some basic SEO to index your posts in Google’s database.
If you are a new blogger and have no idea how to start a blog, it will be helpful for you to start off on the right foot and have me to help you in order to avoid any blogging mistakes, which most new bloggers do.
Do you know?
Most of the new bloggers quit after a few months because of these common blogging mistakes.
That’s the reason, I have written a complete step by step guide to help you with a foolproof tutorial in starting a blog, without learning HTML codes and wasting your time in reading long – boring tutorials, most content writers do.
Do you know?
With the help of my blogging tips and advice, almost 4.5k new blogs have been created and they are earning too with monetization on their blogs.
Steps to start a blog in WordPress:
Step 1: Buy Domain Name and Web Hosting (Approx. $1.99/month)
Step 2: Choose a Perfect Blogging Platform (WordPress is Best & Free)
Step 3: Install WordPress (Free)
Step 4: Install WordPress Theme and Plugins (Free)
Step 5: Basic Customisation (No Coding and Free)
My aim of writing this “how to start a blog” complete tutorial is to guide you to get started the right way only.
From years of helping and guiding people with their blog creation, I have found that many of the new bloggers make continue mistakes when they create a blog, most of the time they abandon their blog.
We don’t want this to happen to you.
So, I want you to take time from your busy schedule and read my entire article thoroughly. It is about 1200 words (hardly 15 minutes tutorial).
So, get comfy. I am taking you through the entire process of setting up the self-hosted blog (wordpress.org).
I think you might be interested in watching this complete video tutorial.
Or else continue reading the article.
Step 1: Buy Domain Name and Web Hosting
 To create a blog on your own domain name, you’ll need two things:
Domain name – This will be the name of your blog or we can say the blog address where people will find your posts again and again. What is the domain name? Let’s take a few examples: For Google, the domain name is www.google.com or www.google.co.in, etc. Similarly, when you will purchase your own domain name for your blog, your blog address will be something like this: www.your-blog-name.com.
The domain name cost about $10/year but keep reading this post till the end and I will be helping you out to know “how to buy a domain name with too low cost”.
Web hosting – This is the space for your entire blog content over the internet. We can say, the home of your blog address. Without having web hosting, you will be unable to use your own domain based website. This is just like our computer hard drive. As all our pictures, files, songs, etc. get stores on the hard drive. But the blog hard drive (web hosting) is over the internet. The web hosting costs around $0.99-$1.99 per month.
It’s less than a Cheese Burst Pizza at Dominoes – so it won’t break the bank balance, But it’s a smart investment to your blog success for future.
Where should you buy a domain name and hosting?
When you decide to buy hosting, the two things always matter.
- Page load speed – The amount of time your blog page takes to get loaded on the visitor’s browser screen.
- Server Uptime – The amount of time, your web host server keeps your blog live on your domain per month. Most of the web hosting companies offer 99.9%, but it isn’t enough (it’s about 42 minutes of your blog down per month). You should aim for 100% Uptime.
There are more than a hundred of different web hosting companies. They all offer you similar service of domain and web hosting with an almost similar price. But since I have been worked with many famous and recommended web hosting companies like Hostinger, Bluehost, A2Hosting, Godaddy, etc…
I recommend Hostinger. Why?
Hostinger is the best in terms of
- Performance
- Easy to use cPanel
- Best for beginners
- Very cheap hosting plans
- 1 Click installation for Blog
However, you should go with other web hosting companies too as far as they are fast, reliable and offers you unlimited bandwidth but with Hostgator, these type of problem never occurs from beginning till you use them.
So, in this step, we have learned how to buy the domain name, how to buy web hosting, which web hosting is better. If you have any question about buying domain and web hosting, never hesitate to comment below. I will respond within 24 hours for you. Let’s move to next step.
Step 2: Choose a Perfect Blogging Platform
Before you start to think about how your blog should look like, you need to choose your perfect blogging platform.
There are about 10+ blogging platforms with their own reliability and easy to use mechanisms. Such as WordPress, Blogger, Tumblr and many more…..
I recommend using WordPress as your Blogging Platform. Why?
As per the chart here, Over 74.6 Million sites using WordPress today. Now, I think it is not needed for me to tell you that which platform is the Boss.
Even my own websites and blogs are built on WordPress Platform, why?
- Free to use: millions of free themes and plugins available for lifetime usage which other blogging platform doesn’t provide.
- Very easy to install and set up.
- WordPress is always secure and updated by WordPress Community Developers: This is the most secure blogging platform as their community always releases updates as per the trend. Many of the bigger brands like Facebook, NASA, Universities, Government Organizations are running their blogs on WordPress only.
- Easy to Customize your homepage and inner pages: WordPress provides you the flexibility to customize your blog as much as you need. There are tons of free themes and plugins available to add more functionalities to your blog whether you want to integrate a Contact Form or User Subscription Box. You can easily integrate Google Analytics tool to track your blog traffic.
Well, I am not saying that other blogging platforms are not good but in my opinion, I have been using WordPress for many years. It has unlimited customization possibilities, future feature integration too. So, without any doubt, just go with WordPress. Especially when you are just starting your blog.
Step 3: Installing WordPress
Now, this is the tech-based task to create a blog in WordPress for free.
But don’t worry!
No coding or prior WordPress knowledge is needed here.
Anyone can install WordPress easily whether he/she has no knowledge of Programming or Computers.
Follow the steps below: (Click here to check the detailed guide of WordPress Installation)
- Just log in to your cPanel Dashboard and find “Softaculous” option or “WordPress”
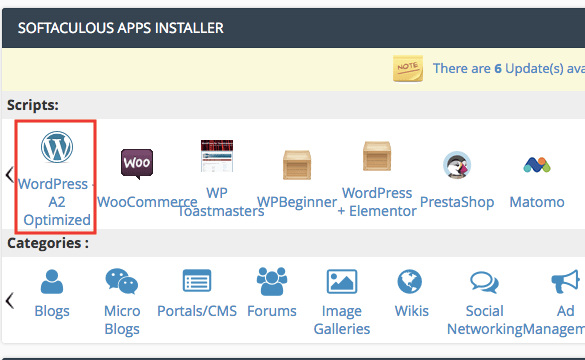
- Click on “Install” WordPress option and fill up the Installation Form.
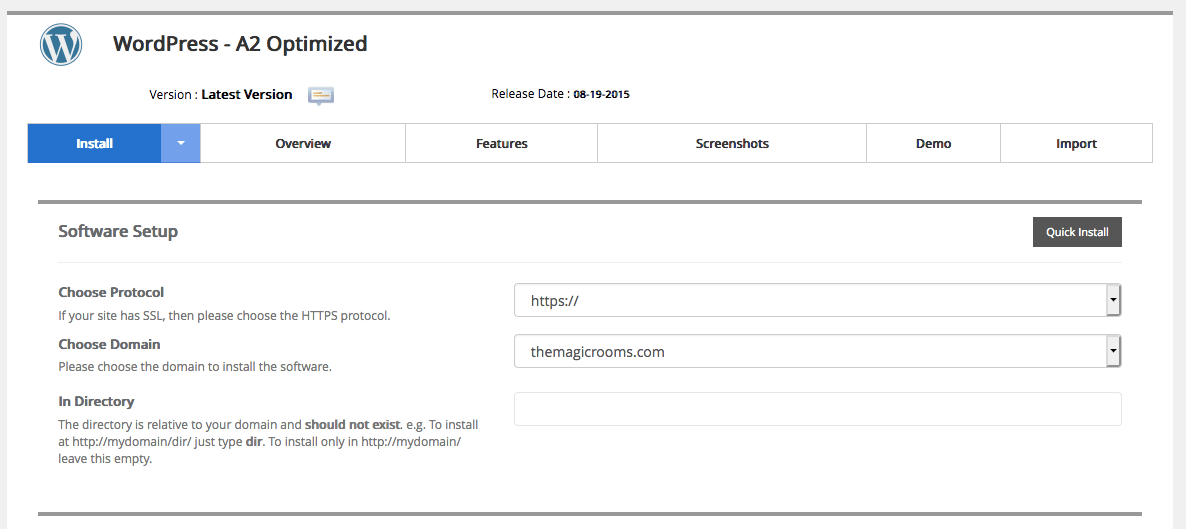
- Once WordPress is installed successfully, you will be provided a WordPress Login URL something like this: https://www.yourblog.com/wp-admin
- Once you will visit this URL, it will ask you to enter your username and password of WordPress admin. This is the same login credentials which you have created in Step 3. Your WordPress Dashboard will look something like this:
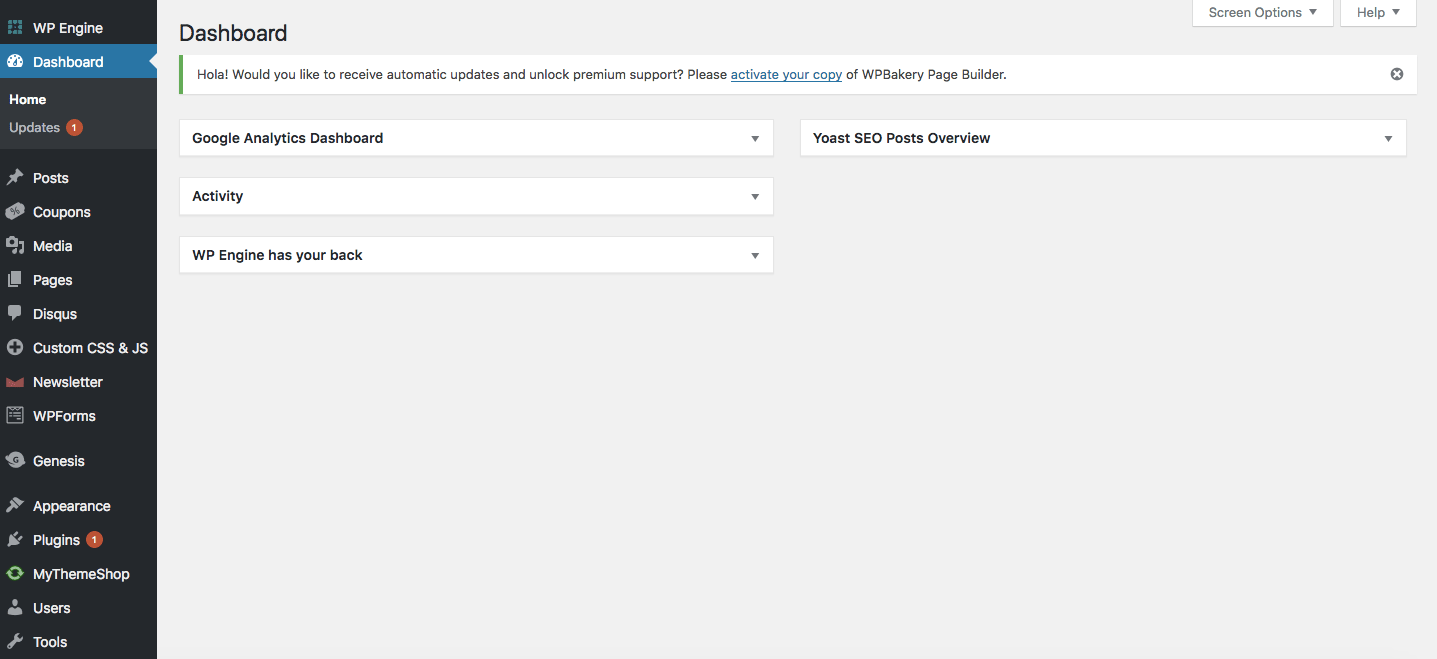
- That’s all easy to install WordPress.
In the next Step, I am going to explain to you how to install a Blog Theme.
Step 4: Installing a Blog Theme on WordPress
In this section, I will explain to you about some WordPress basics like:
- Changing your blog’s design or theme
- Installing new plugins for more features
Alright, so now as you have installed your WordPress, it’s the time to customize your blog design or theme and I promise you, it’s full of fun and easy to work at the same time.
Note: You can log in into your blog by going to the URL: www.yourblogname.com/wp-admin by using the username and password that you have set up with HostGator or with your other hosting company, that you have created at the time of WordPress installation.
Choosing a proper Blog Theme
WordPress uses design templates which are called “Themes”. A theme specifies what your blog will look like. In order to change your blog design and layout, simply change the theme, that’s it.
There are tons of professionally designed free WordPress themes available to choose from. For a new blogger, a free theme like Rishi theme is enough to start a blog but if you are looking for more advanced options then check the premium version of the Rishi theme.
Click here to know the complete theme installation guide on WordPress
Step 5: How to write a post in WordPress
Great, now you have a fully operational WordPress blog ready for your own domain name. Also, you have installed and activated a perfect blog theme for your own interest blog niche.
I congratulate you that you have done a LOT of work on your blog to make it ready so far.
This is the LAST step
I will be guiding you how to initiate with your first blog post
In this section, I am explaining…
1. How to write a post in WordPress
2. How to add images, links and format text
Creating a New Blog post
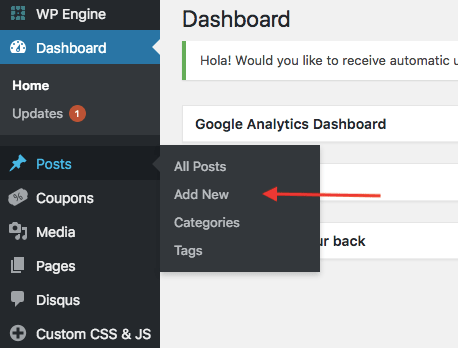
Login to your WordPress dashboard and navigate to the “Posts” menu, Hit “Add New” option.
Write Blog Title and Content
Here in these boxes, you need to enter your blog post title. Consider adding a blog post title of at least 5-6 words at least. This would be better for SEO. And in the Content box, you can start writing your blog content, insert links, insert images, etc.
Blog Post Categories, Featured Image, Post Status
WordPress allows you to create n number of blog post categories without any hassle. Just type the category name and hit the button. Likewise, it also allows you to set a specific featured image to your unique blog post. Be sure to set the Blog Post status “published” otherwise your blog post will not be live on your domain.
Insert Images, Links and Adding Headings to your content
It is very easy to insert images into your blog post content and links as well. Most of the time it requires to specify Headings too in your blog posts for better readability of your content. Let’s check it out these things too.
Things to do after you have created the blog
The most important tasks are: Create your About Me and Contact Me page
- Create an impressive About me page (@melyssagriffin.com)
- Creating a Contact me page (@bloggertipstricks.com)
Both pages created?
Read these articles too which are very much helpful for you to grow your blog
- 7 Common blogging mistakes (That almost all bloggers do at the beginning, I did too)
- Monetize your blog to earn money (Google Adsense Complete Tutorial)
- Using CDN for faster blog speed (@habiletechnologies.com)
- Optimize heavy images automatically (@kinsta.com)
You must be interested in these articles too

